Leather couches are an excellent investment for any home. They’re known for their durability, comfort, and stylish look. However, leather furniture can get damaged over time—scratches, tears, or fading can happen.

The good news is that understanding how to repair a leather couch is something you can do yourself with the right tools and a bit of patience. In this guide, we’ll show you how to repair leather furniture, from minor scratches to more significant tears, in simple, easy-to-follow steps.
Why Leather Couches Need Care
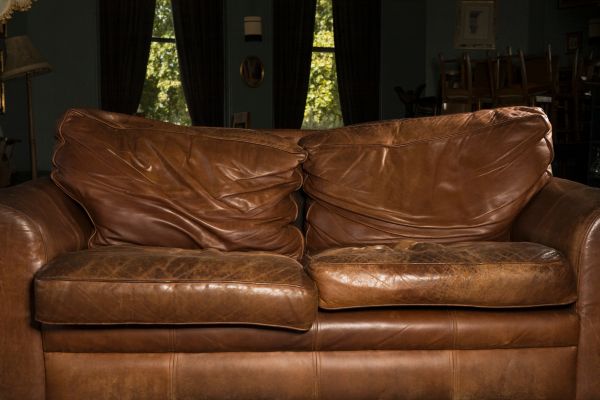
Leather is a strong material that can wear down over time, especially if exposed to sunlight, heat, or regular use. Common issues include fading from the sun, small scratches from pets or sharp objects, and larger tears from accidental bumps or falls. If your couch has some damage, fixing it early is important to prevent the problem from getting worse.
With patience and the proper techniques, you can make your leather couch look as good as new. You’ll find the right solution whether you have a minor scratch or a more significant tear.
How to Fix Small Scratches and Scuffs on Leather
Small scratches and scuffs are the most accessible damage to repair on a leather couch.With these simple steps :

Step 1: Clean the Damaged Area
Before you start the repair:
- Clean the area around the scratch or scuff.
- Use a soft cloth and a leather cleaner (or mild soap and water).
- Wipe off any dirt or oils to ensure the surface is smooth and ready for repair.
Tip : Always use a soft cloth to avoid scratching the leather further.
Step 2: Assess the Scratch
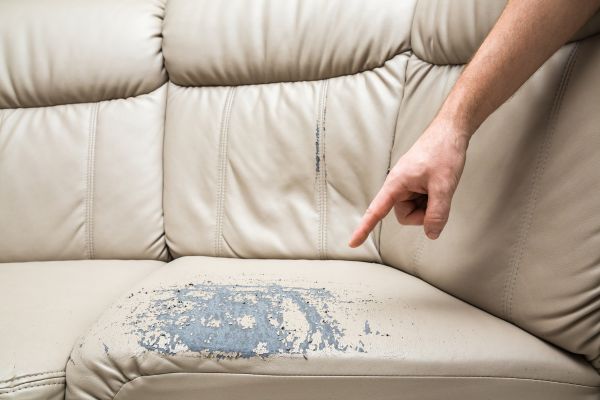
Take a good look at the scratch. You might not need to do much if it’s just a small, light scuff. You can apply some leather conditioner to restore the leather’s look. For deeper scratches or cuts, you’ll need to fill the scratch.
Step 3: Apply Leather Filler
If the scratch is more profound, you’ll need a leather filler. Leather fillers come in different colors, so choose one that matches your couch. Here’s what to do:
- Use a spatula or your finger to apply the filler to the scratch, making sure it covers the entire area.
- Smooth the filler out to make the surface as flat as possible. You don’t want it to look lumpy.
- Let the filler dry according to the product instructions (usually for a few hours).
Step 4: Sand the Area
Once the filler dries, use fine-grit sandpaper to gently smooth the area. Be careful not to rub too hard or damage the leather. Sanding helps make the surface even and blend with the rest of the couch.
Step 5: Apply Leather Dye (If Needed)
If the area still looks a little off or the color doesn’t match, you can apply leather dye. Leather dyes come in a variety of shades to match your couch’s color. Apply it carefully using a soft cloth or sponge and blend it with the surrounding leather.
Step 6: Condition the Leather
After the repair, it’s essential to condition the leather. This will keep it soft and prevent it from cracking. Use a good leather conditioner and apply it to the whole couch, not just the repaired area. This will help maintain the leather’s natural shine.
How to Repair Large Tears and Holes in Leather
If your leather couch has a larger tear or hole, the repair process is a bit more complicated but still manageable. Here’s how to repair a leather couch with more significant damage:

Step 1: Clean the Area
Like minor scratches, the first step is cleaning the damaged area. Use a leather cleaner or mild soap and water to wipe away any dirt, dust, or oils.
Step 2: Cut a Leather Patch
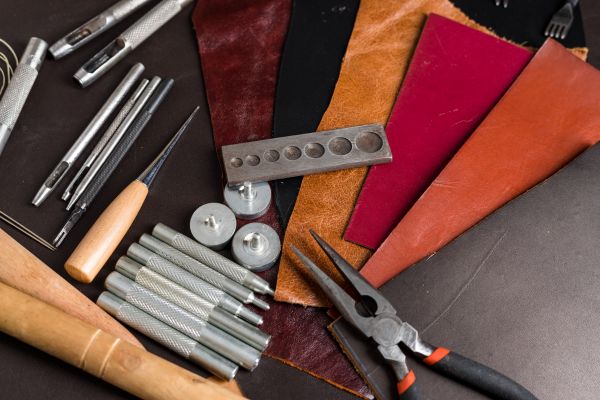
You’ll need a piece of leather that matches the couch’s color and texture to repair a large tear. Find a matching piece and cut it slightly larger than the tear or hole.
Tip : If you need help finding matching leather, you can buy leather repair kits that include patches.
Step 3: Insert the Patch Behind the Tear
Carefully place the leather patch behind the tear. Make sure it covers the entire damaged area. If the patch doesn’t stay in place, use a small amount of leather glue to secure it.
Step 4: Apply Leather Glue
Next, apply leather glue around the edges of the tear and press the edges of the tear firmly against the patch. Hold them in place until the glue dries (this may take a few hours). Make sure the patch is completely stuck before moving on to the next step.
Step 5: Fill the Edges
Once the glue is dry, you may see some gaps around the edges of the tear. Use leather filler to fill in those gaps. Smooth the filler over the edges to blend with the rest of the leather.
Step 6: Sand and Smooth
After the filler is dry, use fine-grit sandpaper to smooth the surface. This will help the repair blend seamlessly with the rest of the couch.
Step 7: Dye the Area
If the patch or filler is visible, apply leather dye to match the color of your couch. Be careful not to get dye on the surrounding leather, and apply it in thin layers to avoid uneven coloring.
Step 8: Condition the Leather
Finally, condition the leather after the repair. Apply a good leather conditioner to keep the material soft and prevent future damage.
Preventing Future Leather Damage
Now that you’ve learned how to repair a leather couch, it’s essential to know how to take care of it to avoid future damage. Here are some tips for maintaining your leather furniture:

1. Condition Your Leather Regularly
Leather needs moisture to stay soft. To keep it in good shape, condition your couch every 6 to 12 months.
2. Keep It Away from Direct Sunlight
Sunlight can cause the leather to fade and dry out. To preserve its color, try to keep your couch away from windows or direct sunlight.
3. Wipe Up Spills Quickly
Liquids left on leather for too long can stain it. Clean up any spills immediately with a clean, dry cloth.
4. Cover High-Wear Areas
Areas like the armrests and headrests get a lot of use. Use a throw or blanket to protect these spots from wear and tear.
5. Fix Small Problems Early
If you notice small scratches or scuffs, repair them immediately to prevent them from worsening.
Discover more : How to Stiffen Leather? | Master the Art of Hardening Your Leather Projects
FAQs | How to Repair a Leather Couch
Q.1 How can I fix a tear in my leather couch?
Use a leather repair kit with adhesive and a patch. Clean the area, apply glue, and press the patch in place. Let it dry thoroughly.
Q.2 How do I repair faded leather?
Apply leather dye or conditioner to restore color. Clean the area first, then evenly distribute the product for a uniform finish.
Q.3 Can I repair a leather couch without a kit?
Yes, you can use leather glue for small tears and conditioner for cracking, but a repair kit gives more professional results.
Q.4 How do I fix scratches on my leather couch?
Rub the leather conditioner into the scratch to blend it with the couch. Use a leather repair kit to fill and color the area for deep scratches.
Q.5 How do I repair cracks in leather?
Use a leather repair cream or filler to seal cracks. Apply conditioner afterward to keep the leather supple.
Q.6 Can I repair a leather couch myself?
You can repair minor damage with the right tools, but extensive damage may require professional repair.
Q.7 What’s the best way to clean a leather couch?
Dust regularly, wipe with a soft cloth, and use a gentle leather cleaner followed by a conditioner to keep it smooth and protected.
Q.8 How can I prevent further damage to my leather couch?
Keep it out of direct sunlight, avoid heat sources, and condition it regularly to maintain flexibility and prevent cracking.
Conclusion | How to Repair a Leather Couch
Repairing a leather couch is easier than you might think, and now that you know how to repair a leather couch, you can tackle both minor and significant damage with confidence. Following the proper steps for minor scratches or more giant tears will make your couch look as good as new.

Remember to regularly condition your leather furniture and protect it from sunlight and moisture to keep it in top shape for years to come. And if the damage is too extensive to repair on your own, don’t hesitate to seek professional help.
Also read : How to Repair Leather Car Seats | Restore Comfort and Style Today

